Roadtrek Modifications
Here are few things that weve done to our 2006 210 Popular. These are mostly modifications that we've invented ourselves. We've also made use of commercial, off-the-shelf products and some of these are described in the "Products" section.
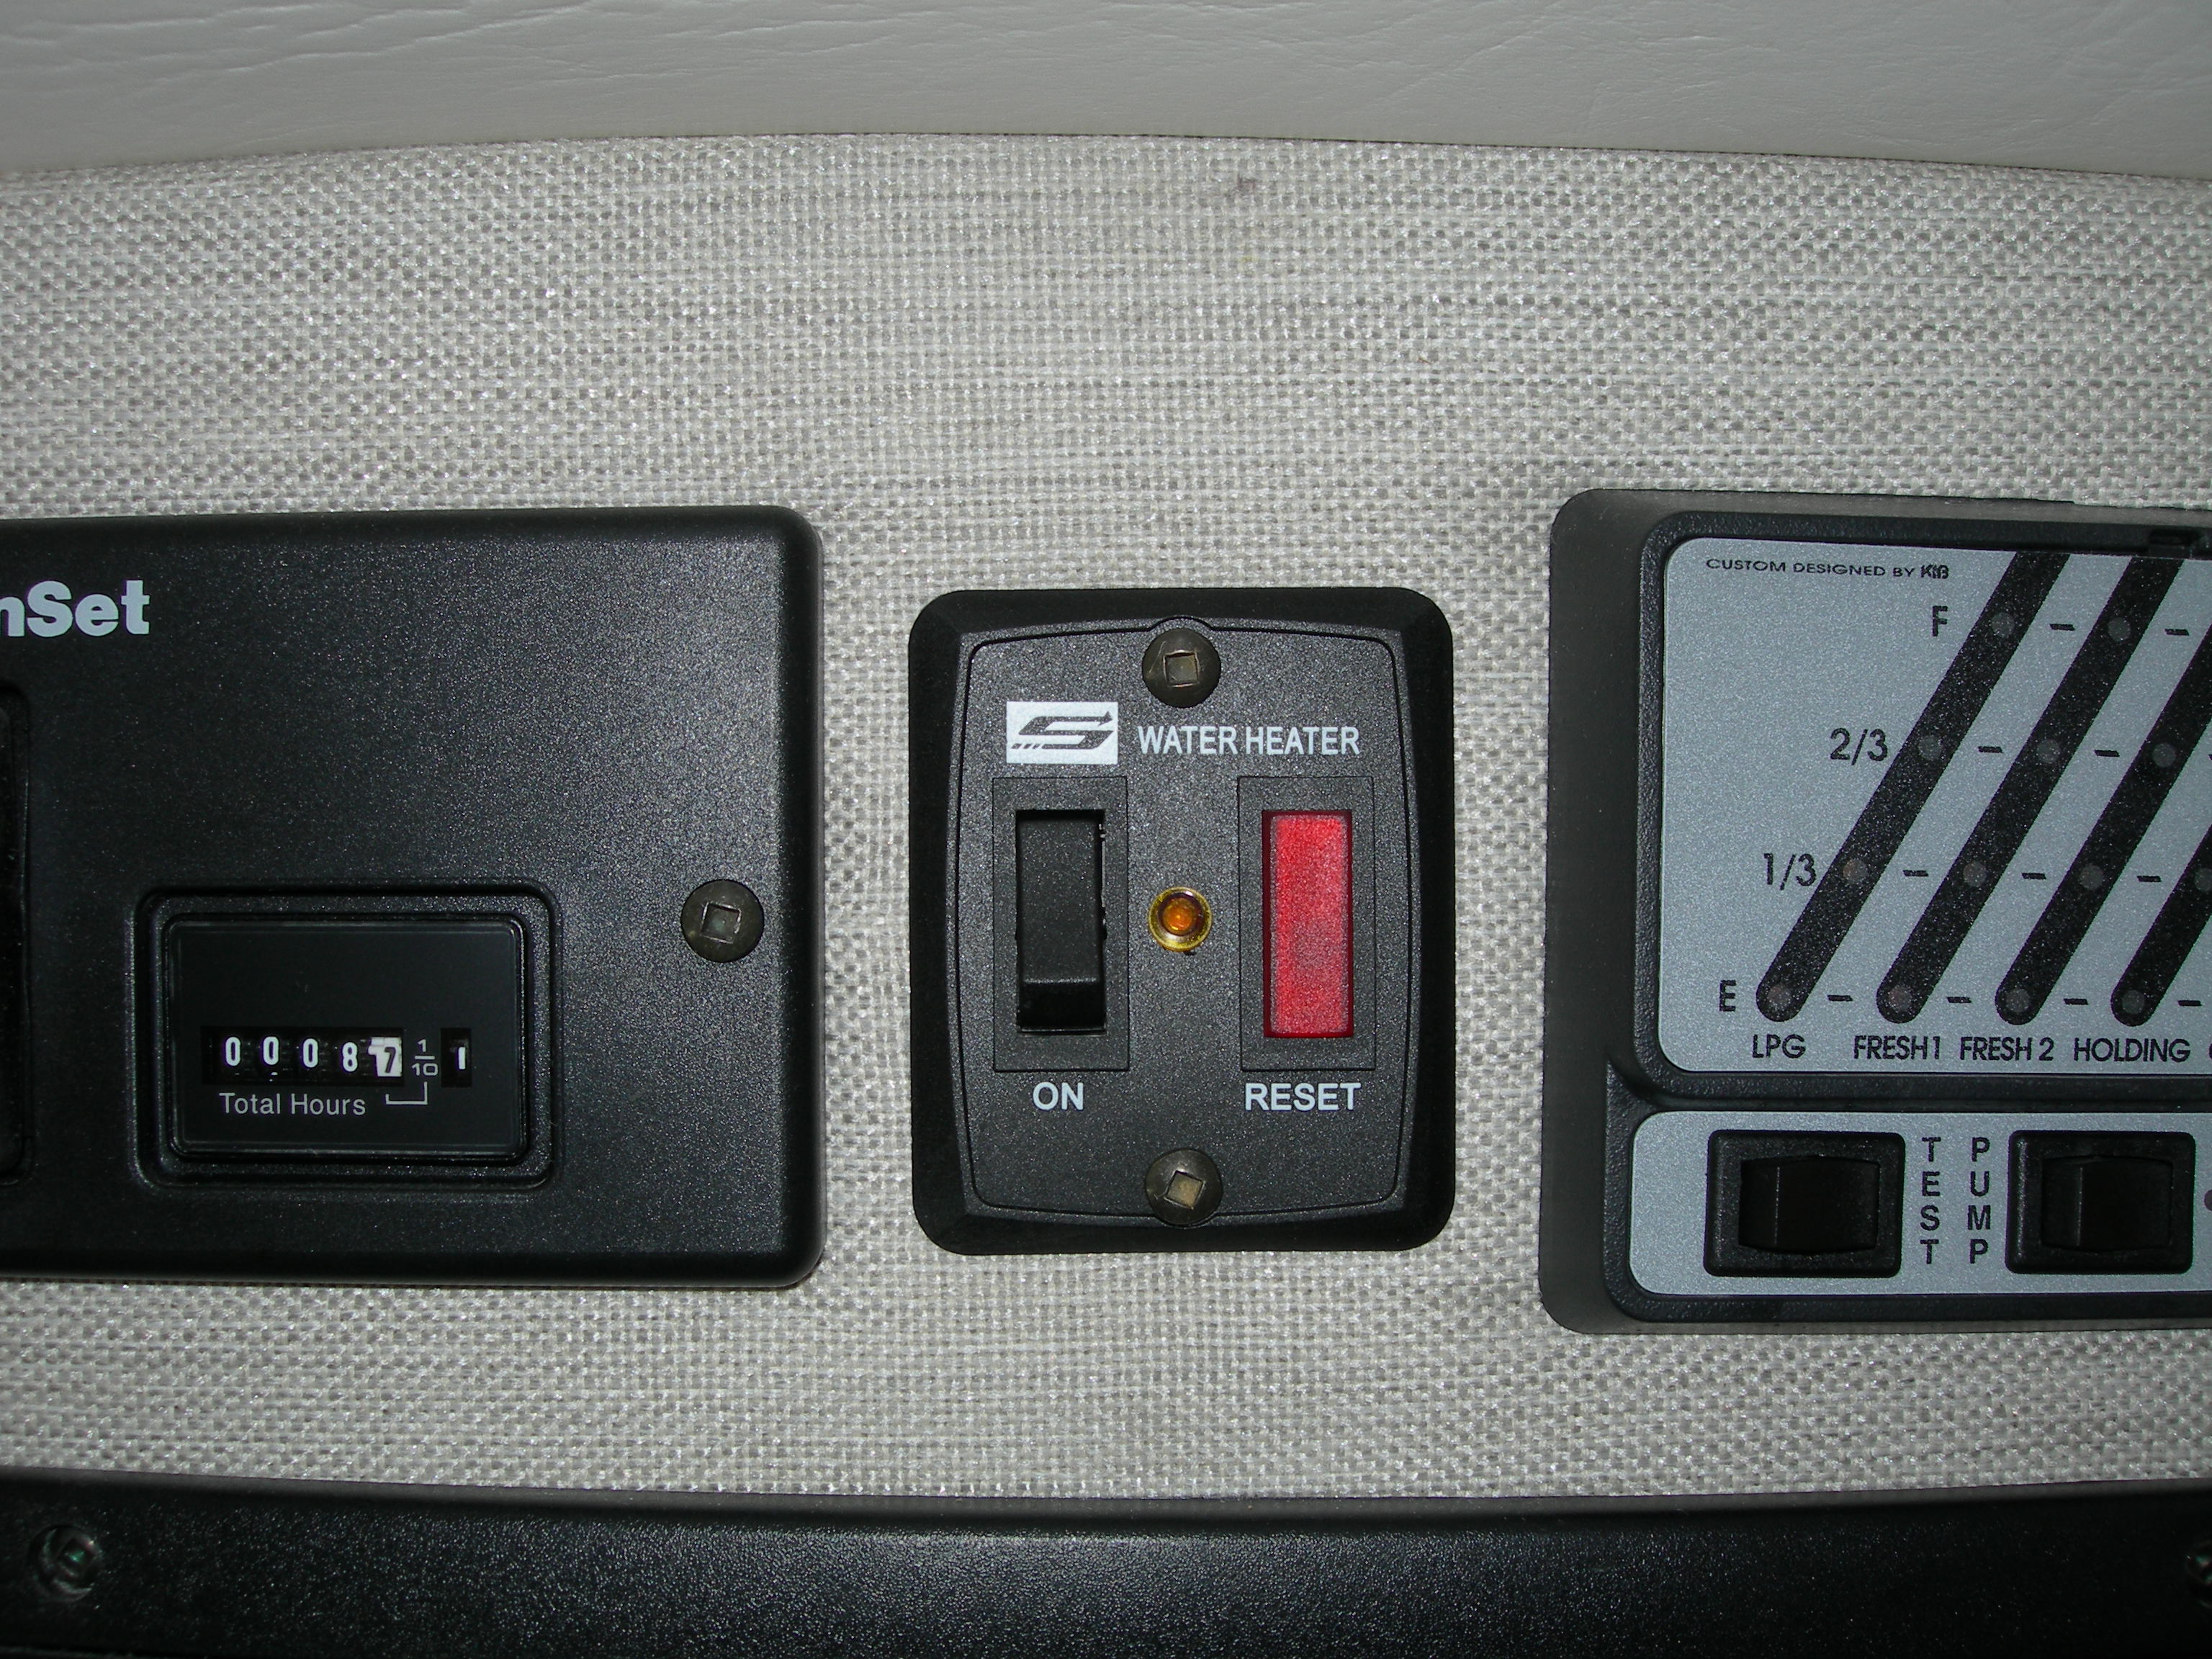
On more than one occasion weve left the water heater turned on long after it was no longer needed. The black-on-black rocker switch is hard to notice. We installed a small light emitting diode (LED) between the switch and the red trouble lamp. It provides a reminder. Connect the lamp between the green (negative) wire on the lamp and the black (positive) wire on the switch. If using a LED be sure to observe polarity of the lamp!
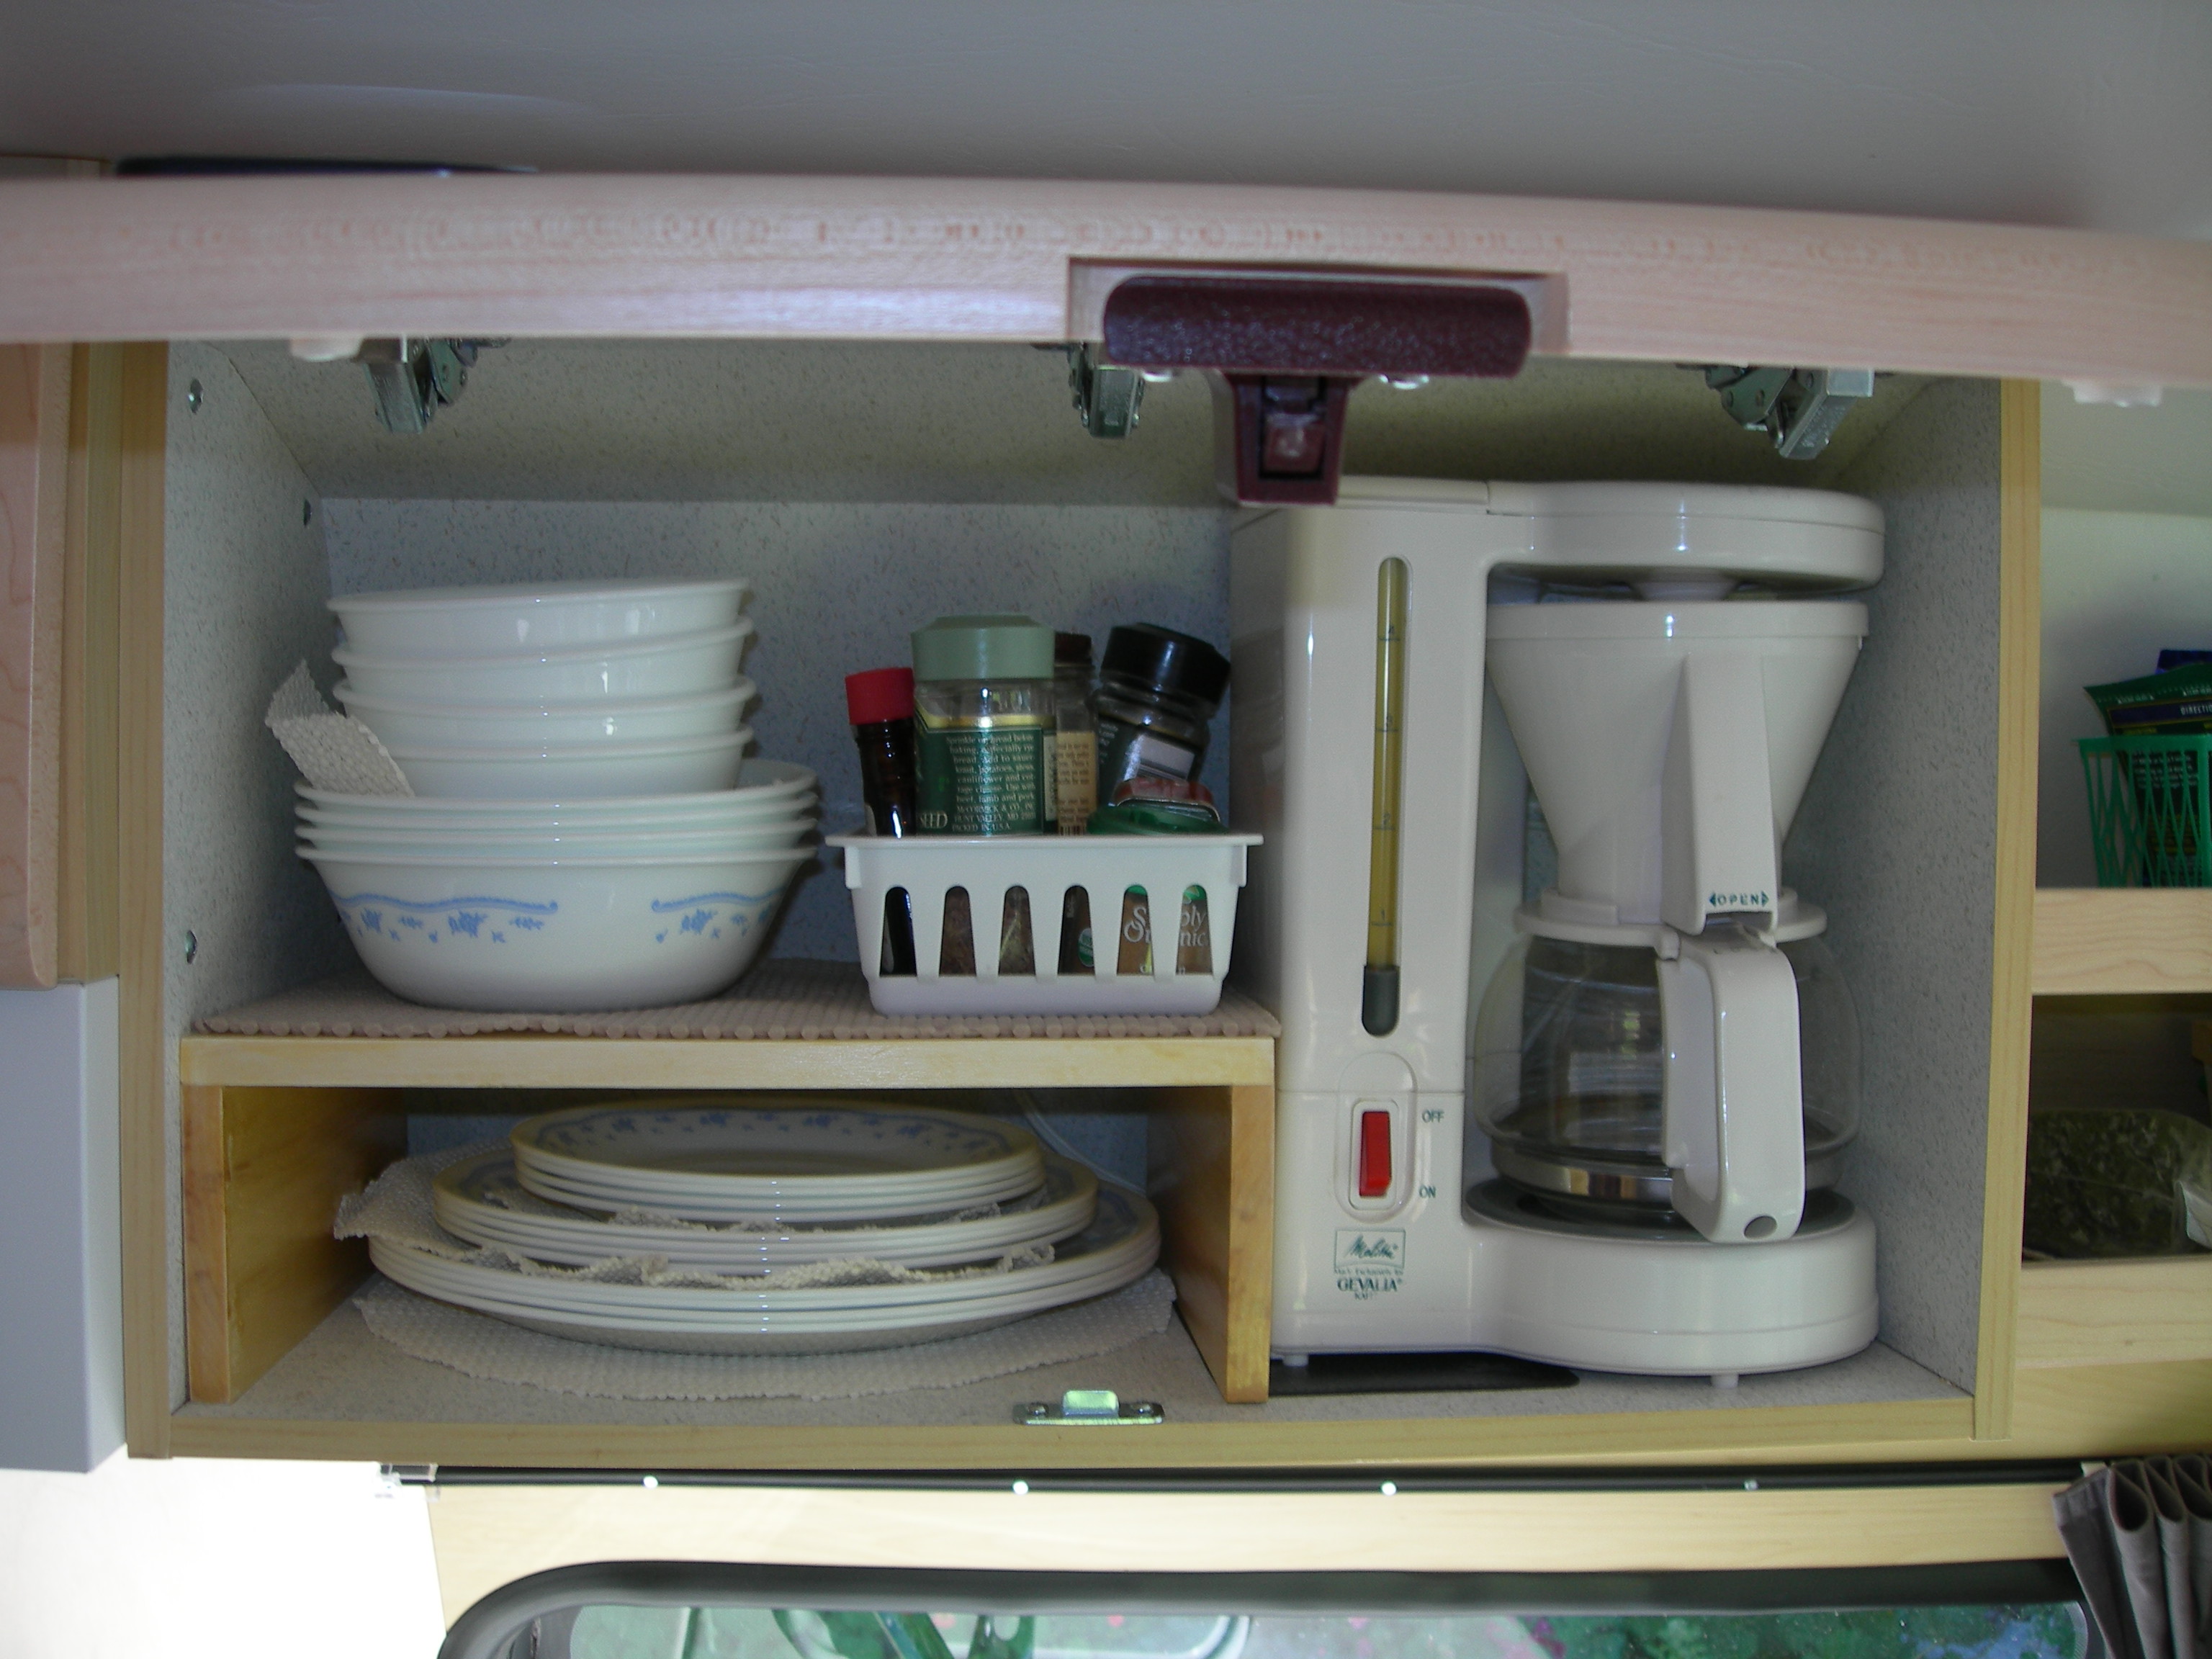 Shelves inside the cabinets help to keep dishes in order and easy to access.
This one is made of ½ inch aspen from Home Depot. Custom shelves take time to
make but they do exactly what you want them to do. For example, note the snug
fit for the coffee maker.
Shelves inside the cabinets help to keep dishes in order and easy to access.
This one is made of ½ inch aspen from Home Depot. Custom shelves take time to
make but they do exactly what you want them to do. For example, note the snug
fit for the coffee maker.
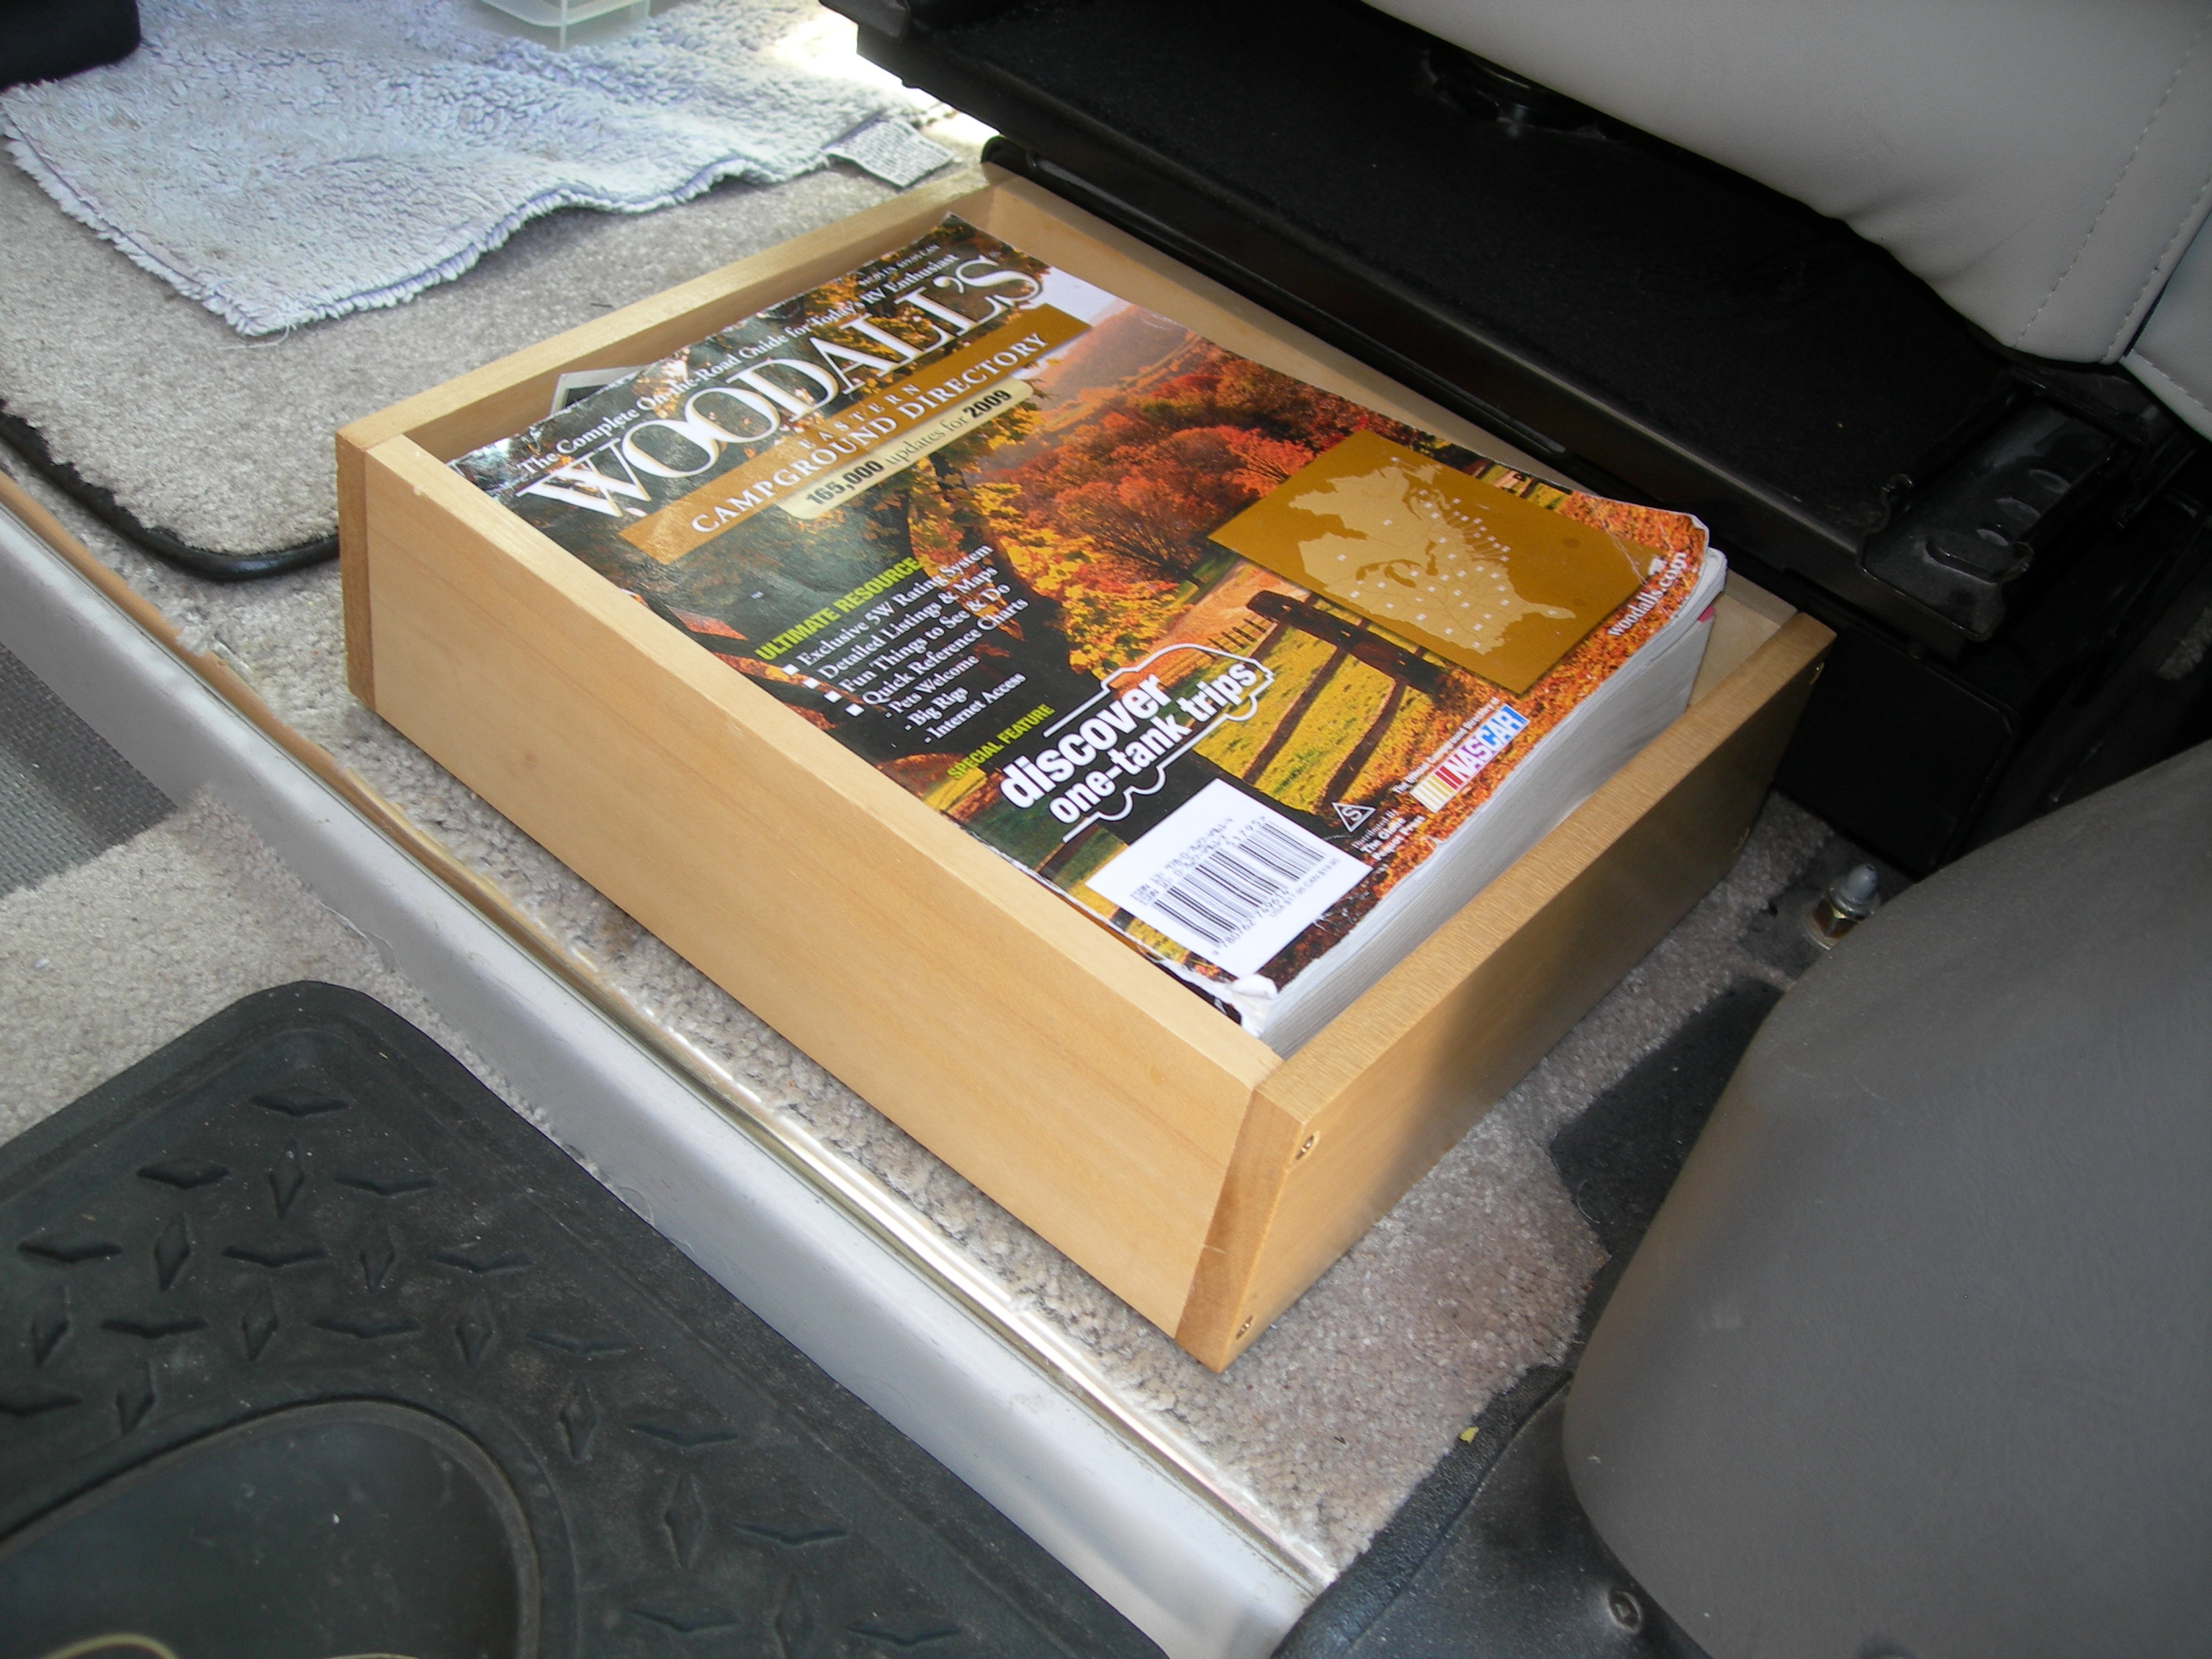 We
also added a wooden box back of the passenger seat. It's bolted to the metal
seat support so that it doesn't slide around. We keep camping guides there and
it's easy for the navigator to reach around and grab a book. Make sure that
you don't drill through any of the wiring under the passenger seat.
We
also added a wooden box back of the passenger seat. It's bolted to the metal
seat support so that it doesn't slide around. We keep camping guides there and
it's easy for the navigator to reach around and grab a book. Make sure that
you don't drill through any of the wiring under the passenger seat.
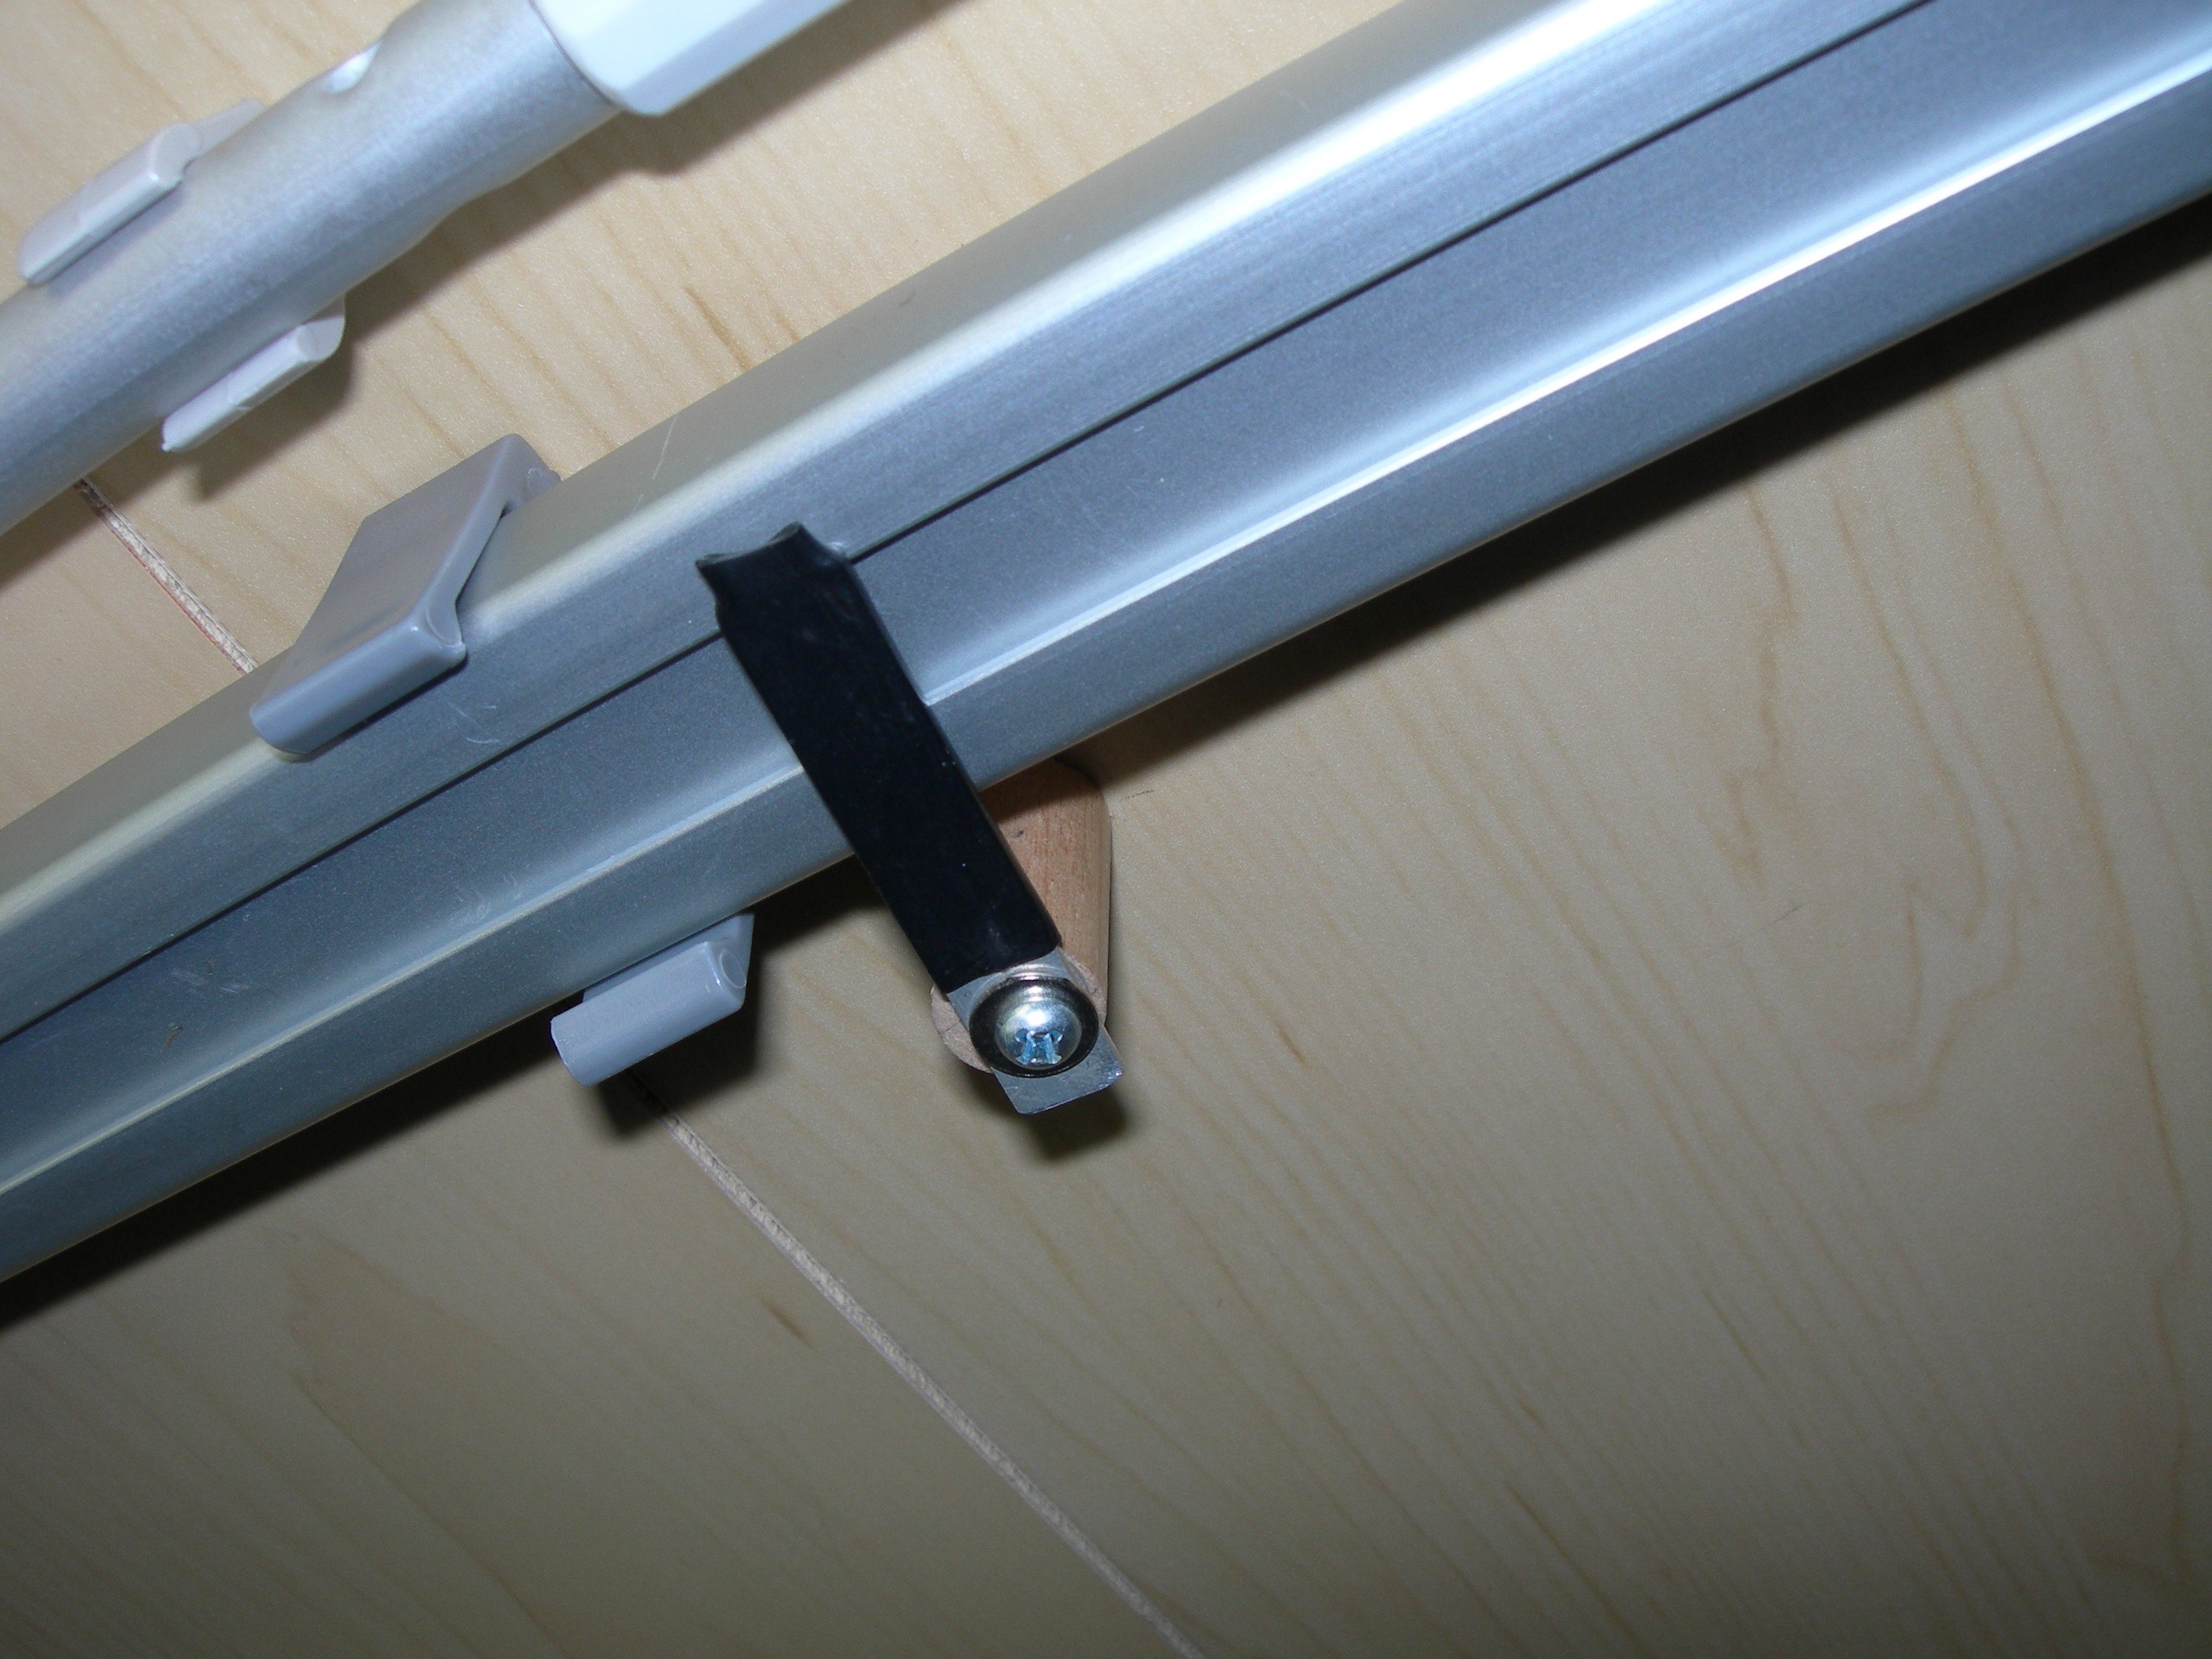 The
clips in the basement for storage of the awning brace tend to lose tension.
After awhile the slightest touch will cause the brace to fall down. The solution
was to make a 1 wooden spacer with a pivoting metal arm. The arm is covered
with heat shrink tubing. Its easy to get the brace out and the brace stays
put when traveling or loading things into the basement. Make two, one for each
end.
The
clips in the basement for storage of the awning brace tend to lose tension.
After awhile the slightest touch will cause the brace to fall down. The solution
was to make a 1 wooden spacer with a pivoting metal arm. The arm is covered
with heat shrink tubing. Its easy to get the brace out and the brace stays
put when traveling or loading things into the basement. Make two, one for each
end.
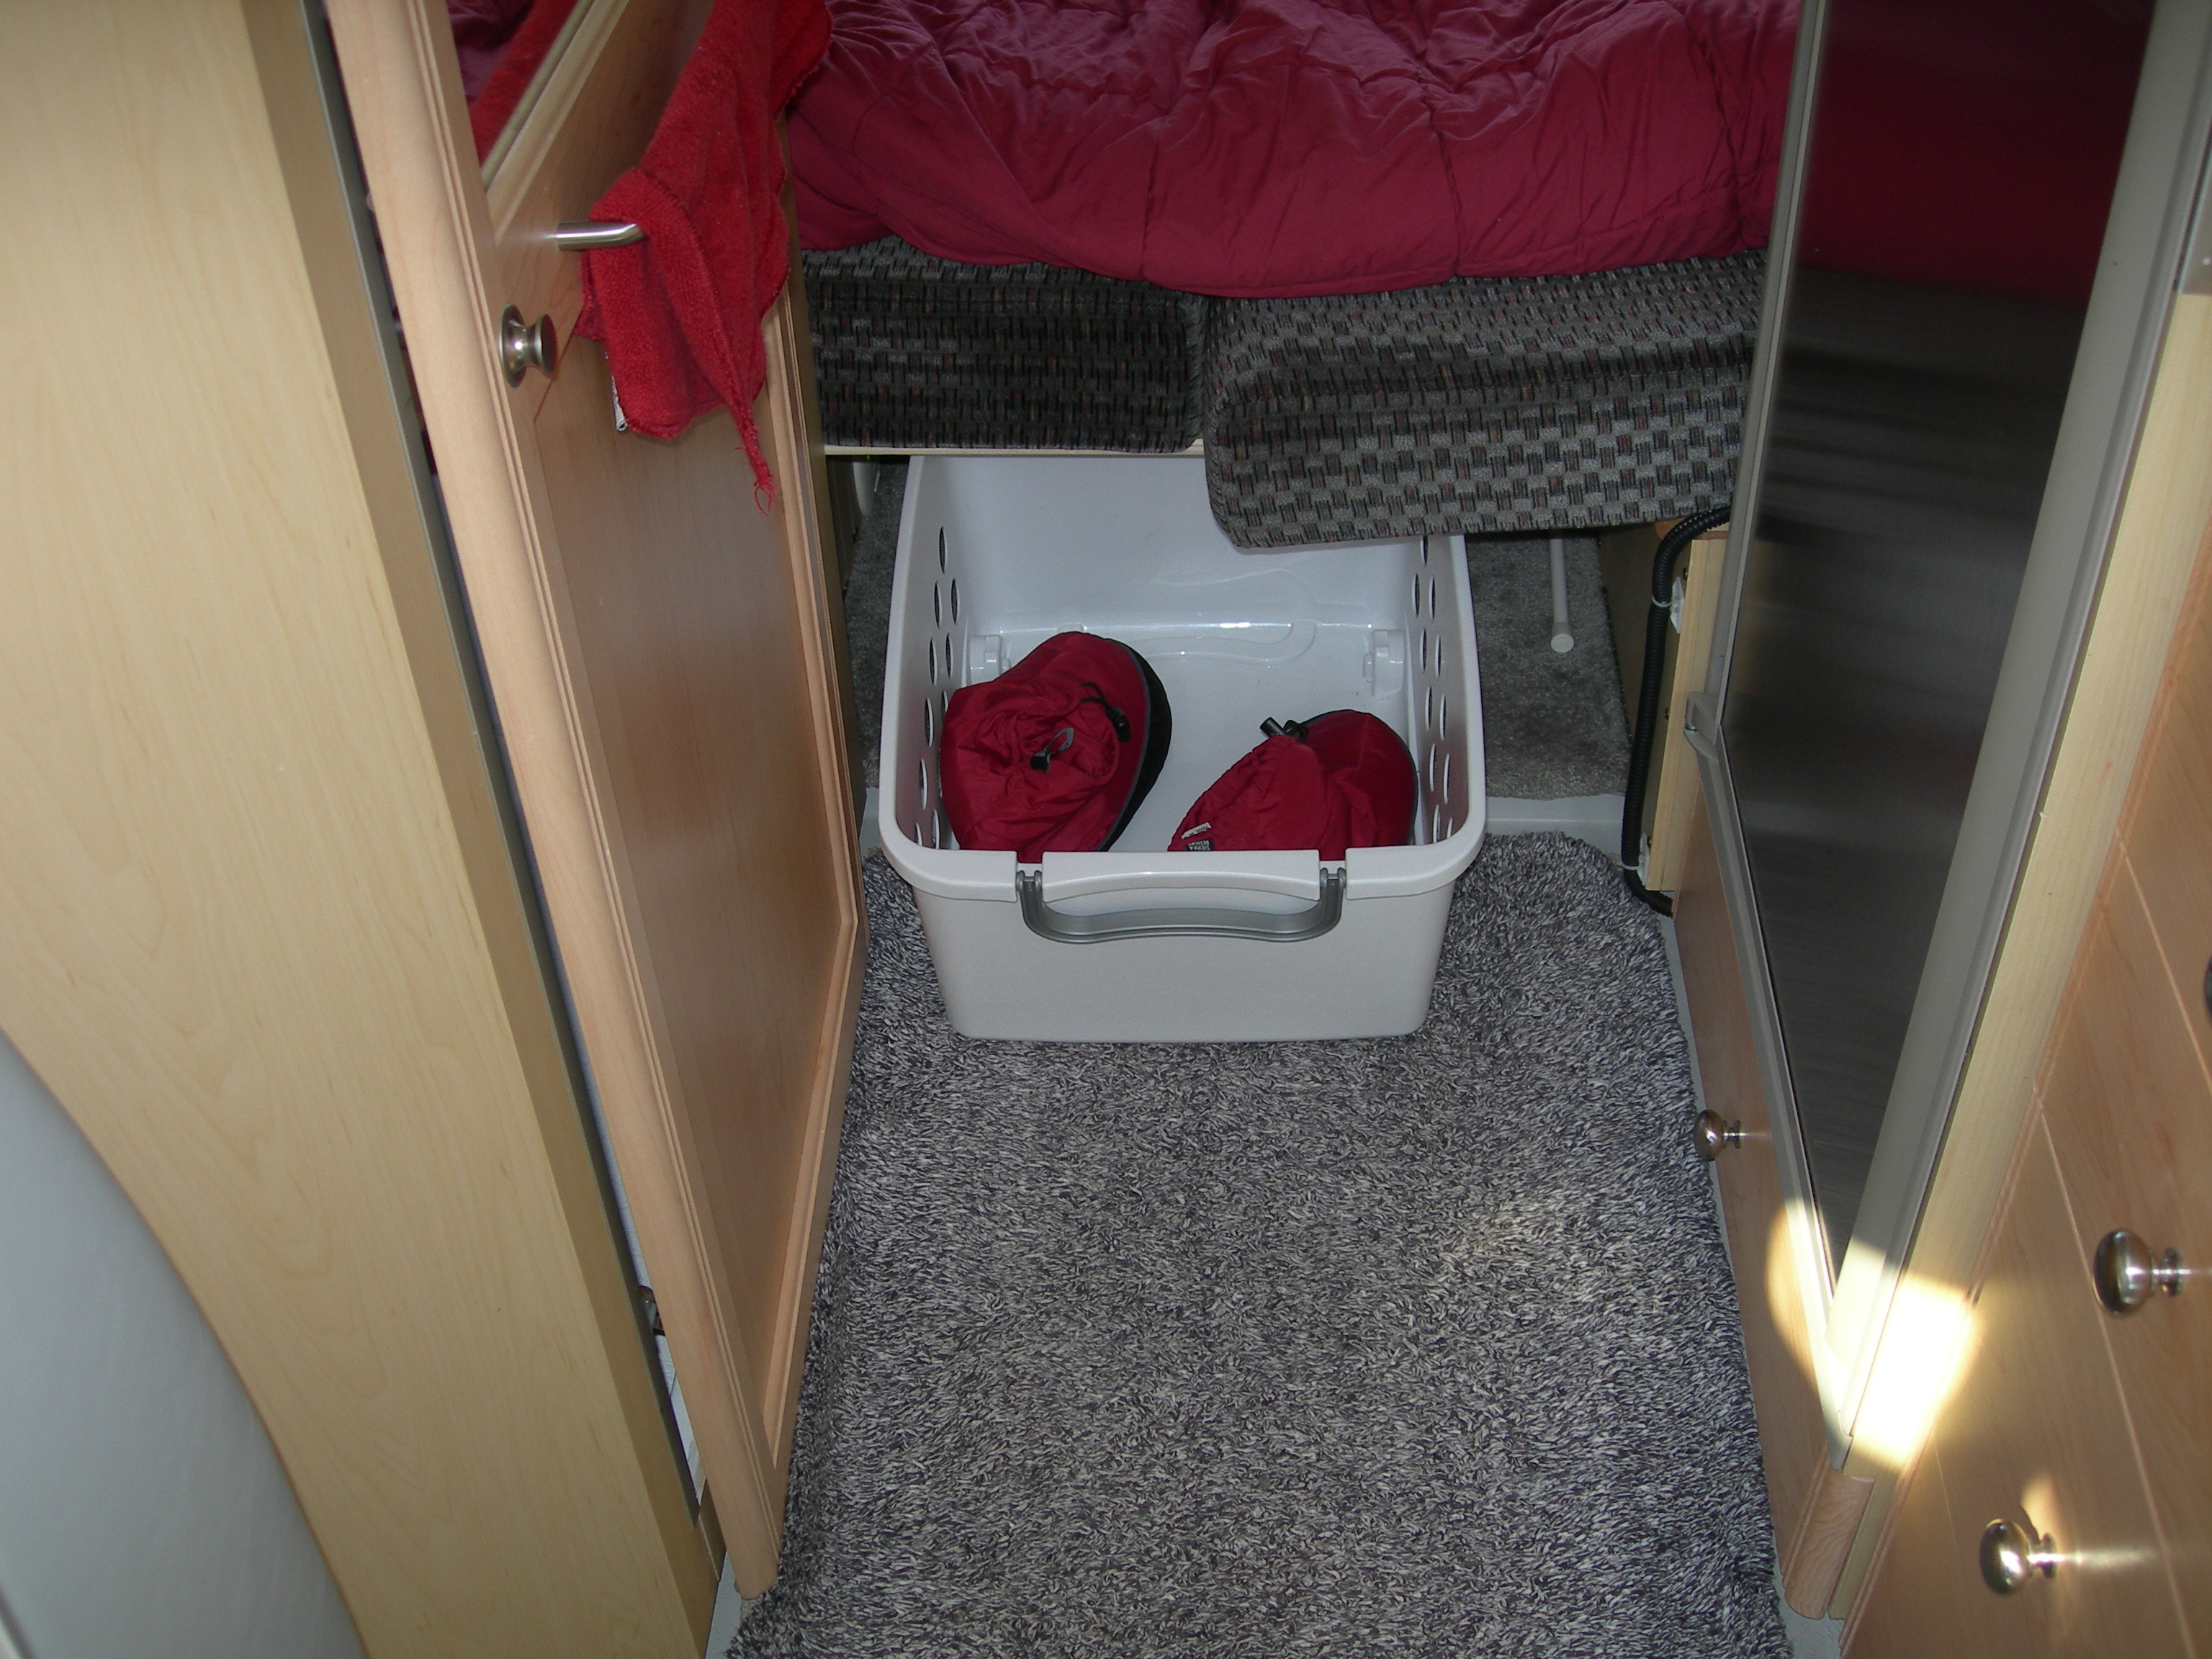
We leave the bed made up all the time when we travel. Shoes and extra clothes go under the bed in the little "tunnel". We use a rolling plastic bin from Walmart for the shoes. We put an adjustable refrigerator bar from Camping World to keep the basket from rolling forward. Clothes are kept in collapsible duffle bags on the right of and behind the rolling basket.
The next image covers a couple of miscellaneous tips.
 We
added a Radio Shack wireless temperature sensor to the refrigerator. This
allows us to monitor the interior temperature without having to open the
door. We also installed an external temperature sensor near the rear bumper
so we can know how cold it is in the morning! The remote sensors work
on different frequencies and one display unit can read up to three sensors.
We used Radio Shack but Amazon or Ace Hardware has these at low prices.
We
added a Radio Shack wireless temperature sensor to the refrigerator. This
allows us to monitor the interior temperature without having to open the
door. We also installed an external temperature sensor near the rear bumper
so we can know how cold it is in the morning! The remote sensors work
on different frequencies and one display unit can read up to three sensors.
We used Radio Shack but Amazon or Ace Hardware has these at low prices.
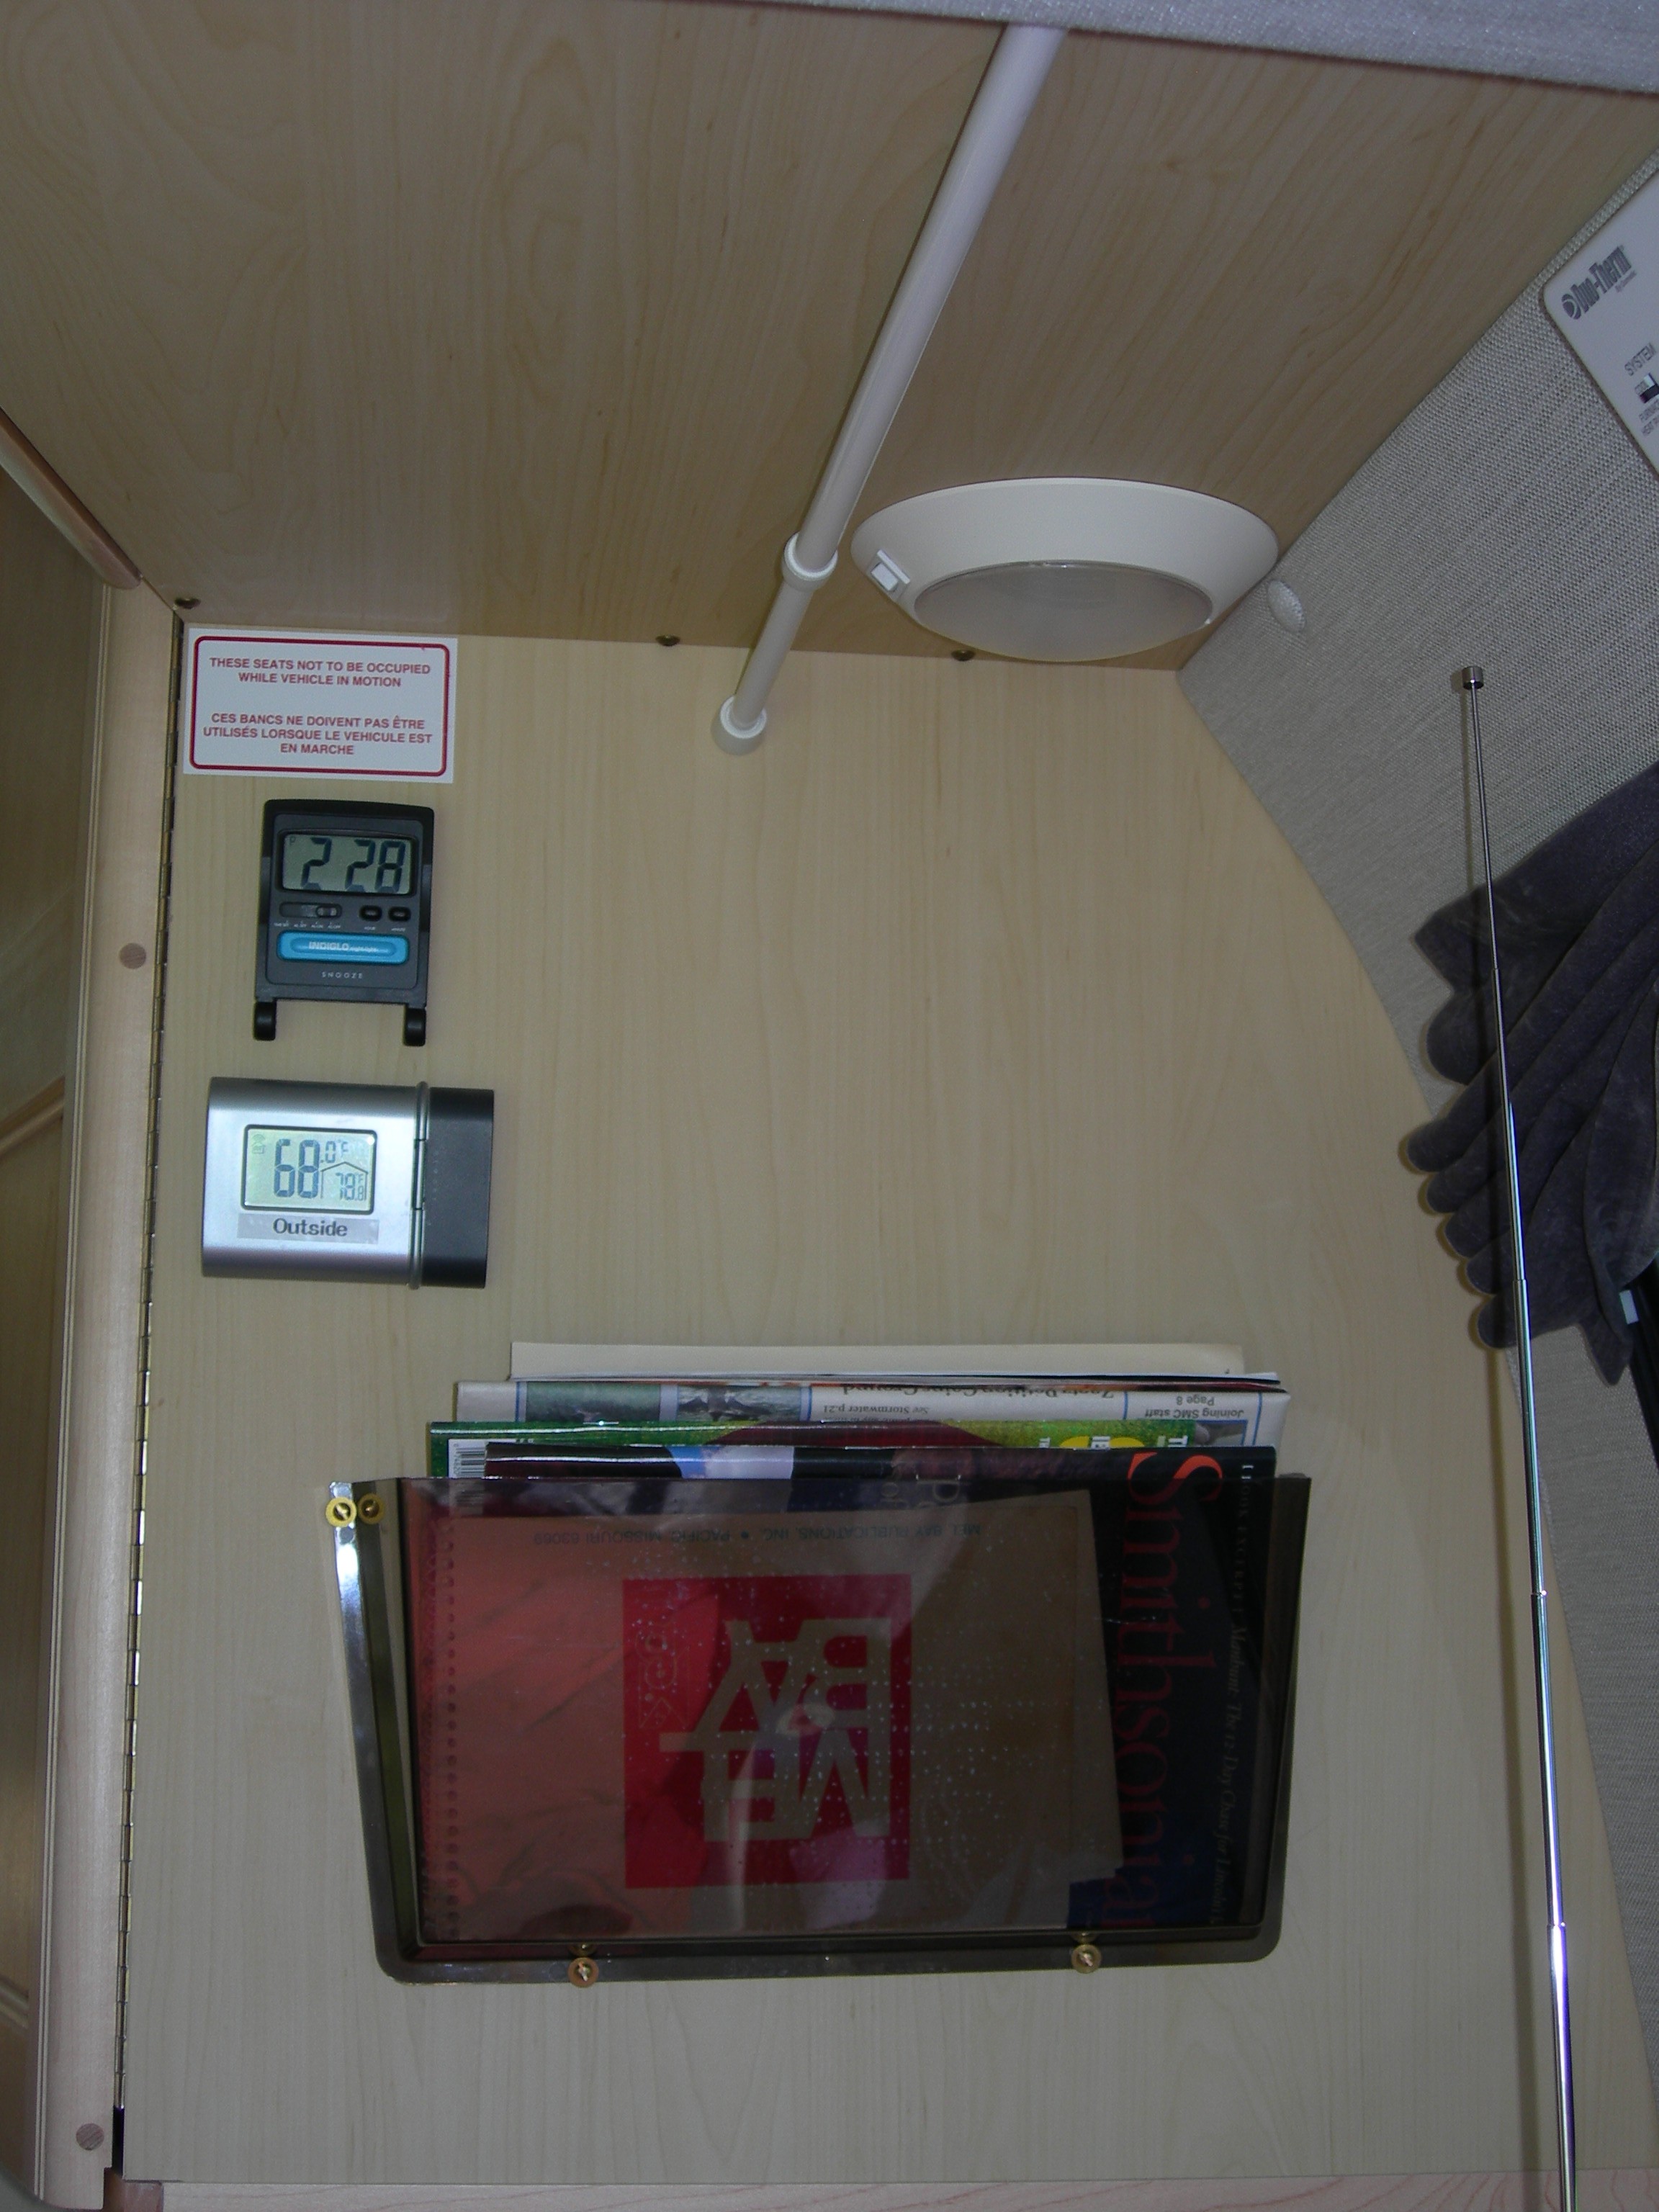
We installed a Timex travel alarm clock in the sleeping area too. This clock is unique in that you can touch the blue snooze bar and the screen lights up. This is great for checking the time in the middle of the night without turning on the lights. It came from Walmart. The front of the original flip case was removed and Velcro was put on the back to hold it to the wall.
Note the plastic file holder from Staples for magazines and other reading material.
Finally note the adjustable bar overhead. We use fast drying Aquis towels. We have two bars, one on each side of the rear sleeping area. These bars are from Camping World and are supposed to be used in an RV refrigerator to keep things from falling over when driving. We put the towels over the bars when were driving and by the time we arrive the towels are dry and can be put away.
The Products section of this site has some information on towel bars that are permanently mounted and which match the Roadtrek.
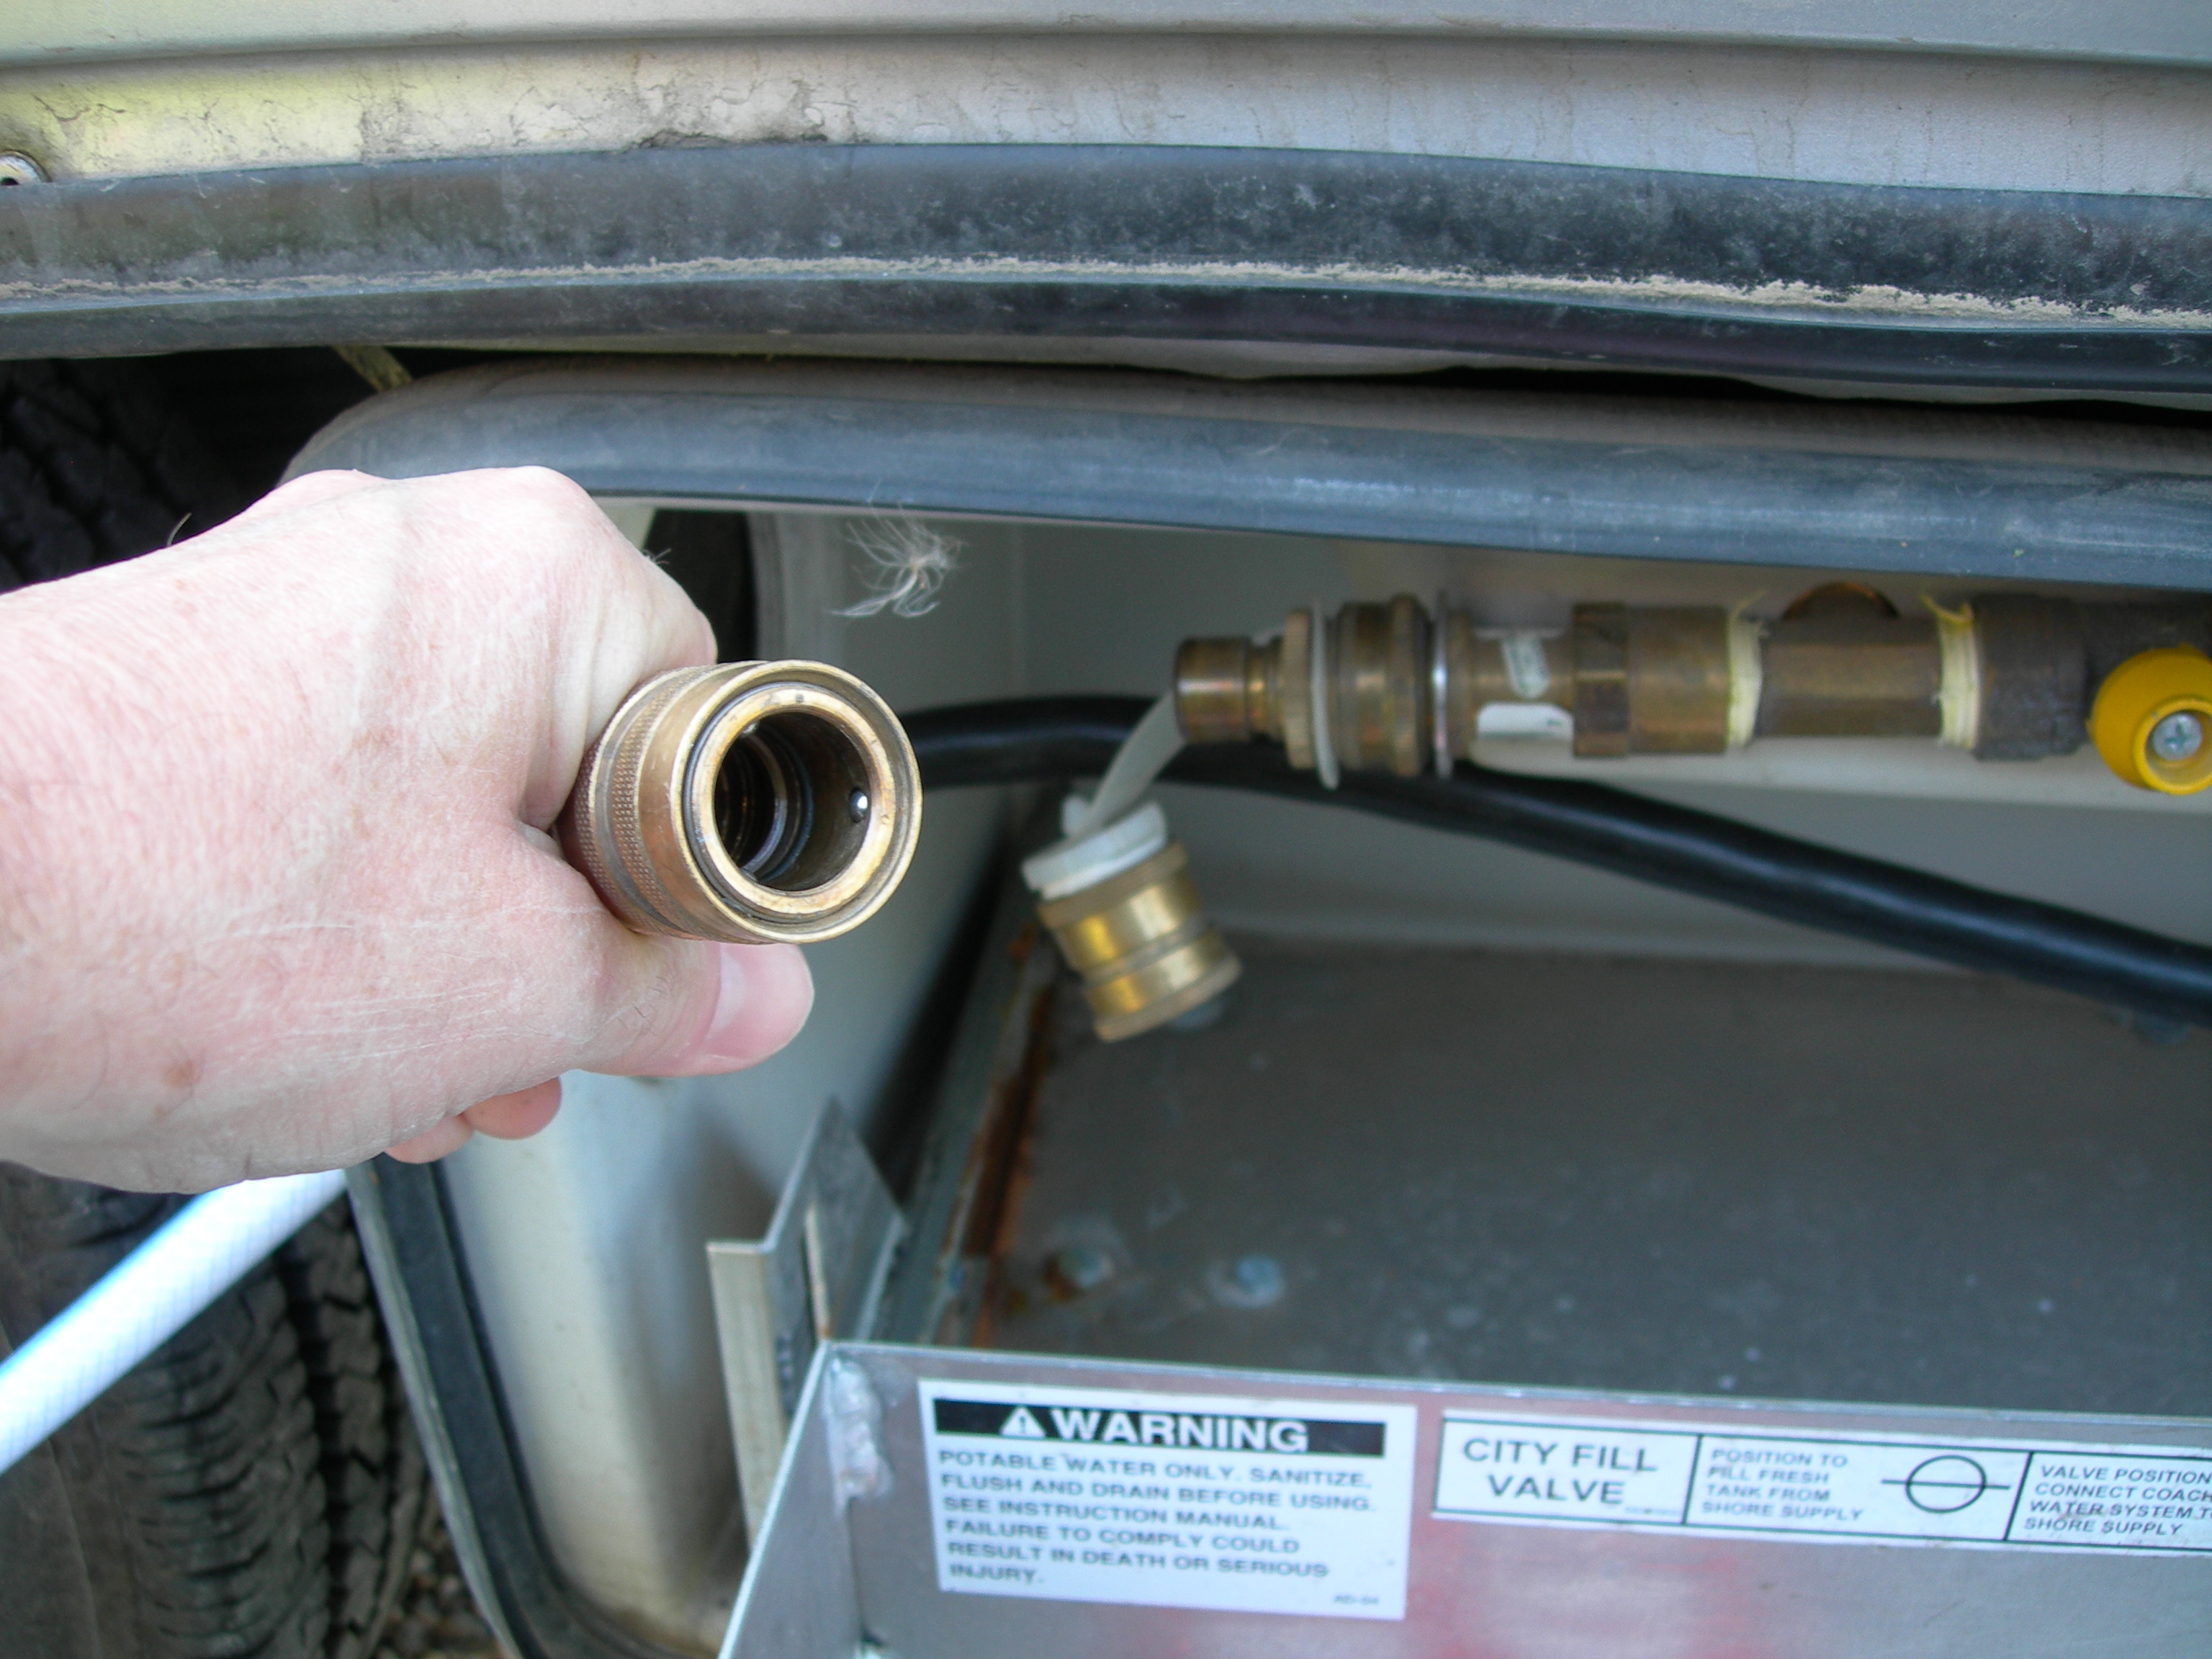 Quick
release water fittings make it easy to hookup at a campground and ensure
that you get a tight fit every time. Screwing and unscrewing connections
takes time and often requires Teflon tape. We put a female quick disconnect
on the water feed line and another female on the stopper. (The stopper
is in place when using the internal water supply and pump.) Our Roadtrek
came equipped with the male end.
Quick
release water fittings make it easy to hookup at a campground and ensure
that you get a tight fit every time. Screwing and unscrewing connections
takes time and often requires Teflon tape. We put a female quick disconnect
on the water feed line and another female on the stopper. (The stopper
is in place when using the internal water supply and pump.) Our Roadtrek
came equipped with the male end.
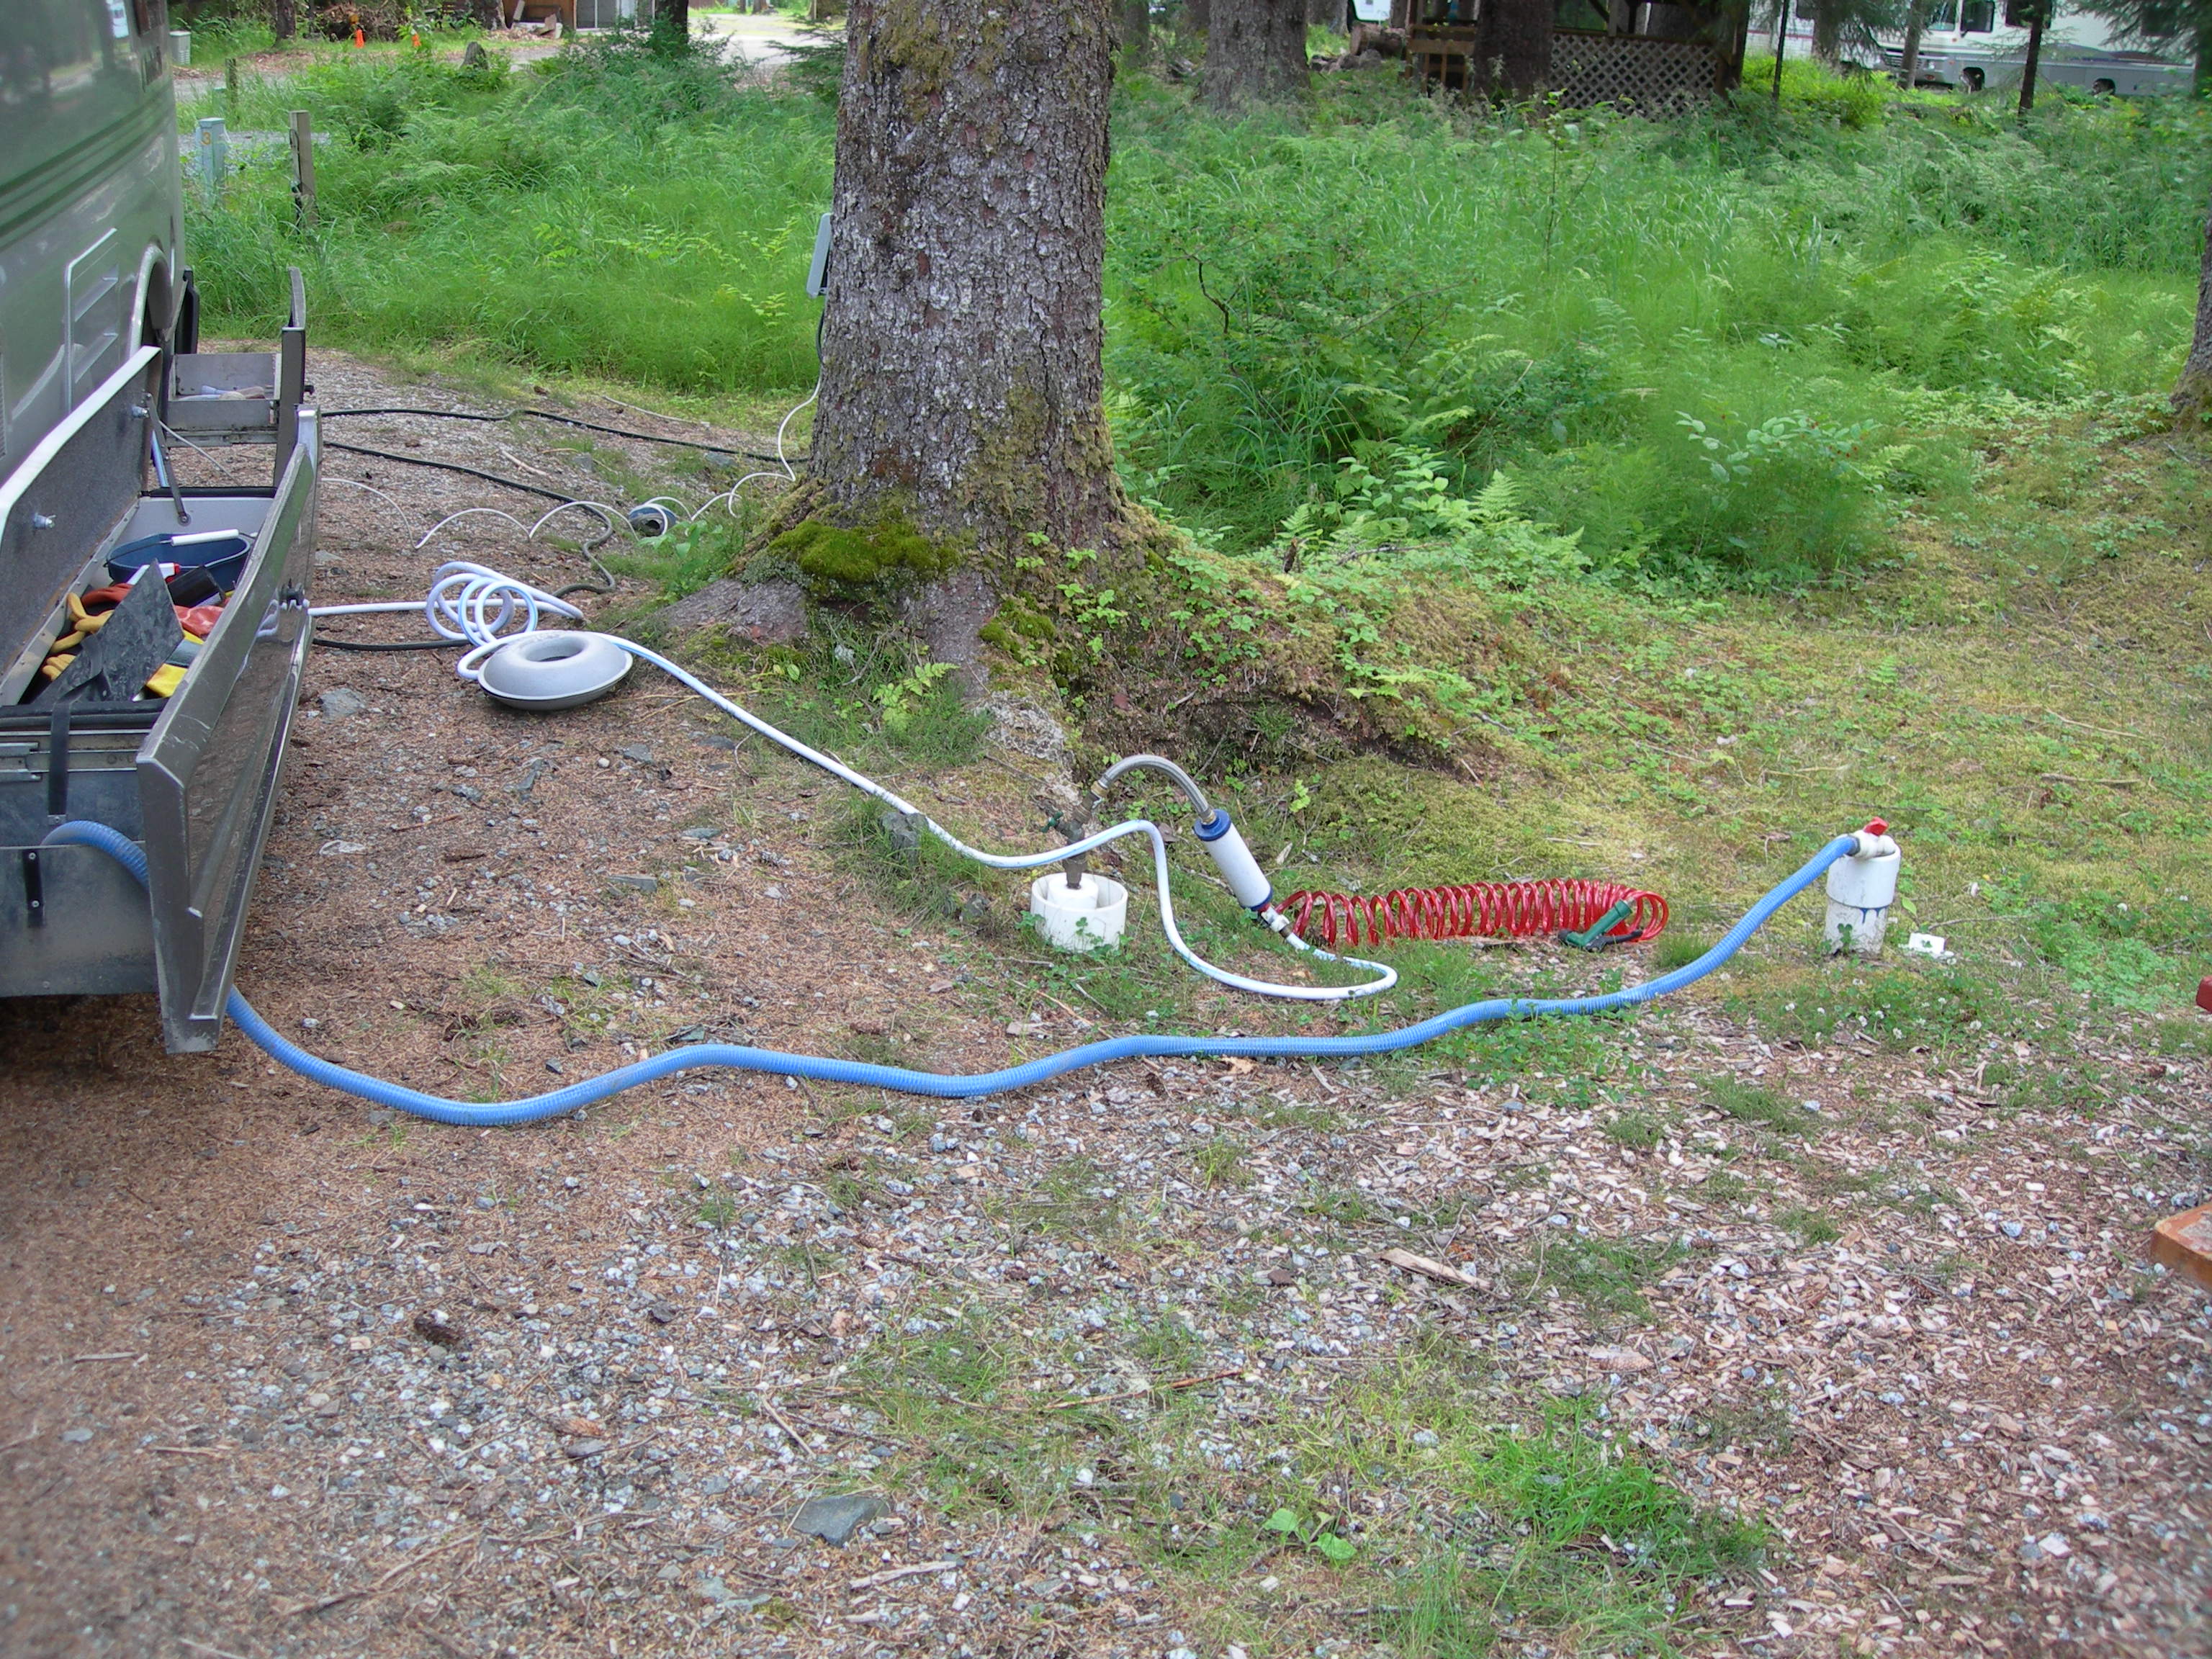
This next item is related to water and may be "old hat" for experienced travelers. Starting at the campground faucet we have a pressure reducer. That is followed by a water filter. On the other side of the water filter is a hose "Y". One side of the "Y" goes to the hose that goes to the Roadtrek (see above) and the other side of the "Y" is usually left unconnected.
When you are leaving the campground you shut off the campground water and then release the pressure in the hoses by opening the other side of the "Y". Otherwise you can get we!
A small hose can be attached to that "Y" for doing general washing too and we use a cheapie coiled garden watering hose from Walmart. When you're at a full service site you can use the garden hose to wash things down after dumping the tanks. (Note the blue dump hose in this picture.)
Here's what this configuration looked like in Juneau Alaska:
Updated 12/22/19